Brick Wall Repointing Cost
How much does it cost to repoint a brick wall?
The average cost to repoint a brick wall in the UK is £50 to £60 per square metre. However, prices can vary depending on the property, mortar type, and location.
This guide breaks down average repointing costs per square metre, what you’ll pay for full walls or houses, and the factors that affect pricing in the UK.

Get a House Extension Quote Today
Find Reviewed Builders Ready to Quote for Your Extension
- Compare free no-obligation quotes from multiple trades!
- Save time & cut costs on your new extension
- In association with Checkatrade
- Checkatrade Guarantee up to £1,000
User submitted prices
Below are prices submitted by users of the website, this will give you an idea of actual costs paid for repointing.
| Job type | Description | Price | Units | Region |
|---|---|---|---|---|
| Repointing | Raking out and repointing all of the brickwork in a wall about 80 sq metres. Clear up, including the reinstatement of a passageway with new stones. Tower scaffold included in price. | £4,100 | Total price | East of England |
| Repointing | Ful detached 4 bed home. 110m² | £85 | Per m² | North West |
| Repointing | material and labour | £800 | Labour only | London |
| Repointing | Stone wall lime mortar repointing 47m2 in sand and Lime. | £4,900 | Total price | South West |
| Repointing | Had my house repointed 220 mts squared app, 75 bricks replaced, very pleased with job. | £5,544 | Total price | Northern Ireland |
| Repointing | Rake out to 22mm gable end and repoint 60m2. Rake out front of house to 22mm and repoint 25 m2. Matched original colour with sand & lime mix. | £3,960 | Total price | South West |
| Repointing | Repoint Gable end on 3 bed semi in sand cement mix/bucket handle finish. Used own scaffolding tower. Approx 5 days work 38m2. | £1,320 | Total price | North East |
| Repointing | Repointed full house, typical three bedroom semi. Grind out old mortar to 12mm, replace broken bricks (4) and repoint whole house including chimney. Water proof brickwork with waterproofing spray. Power hose and clean surrounding ground. | £2,650 | Total price | North East |
| Repointing | Cut out and re-point using traditional lime mortar. Pointing to match existing color and methods | £105 | Per m² | South West |
| Repointing | Gable end, grind out &repoint in sand & cement, handboard, approx 80sqm. scaffold incl. 3wks work min. | £4,750 | Total price | North West |
| Repointing | 78 square metres, rake out and repoint, bucket handle finish, replace approx 20 damaged bricks. Scaffold not included. | £4,225 | Total price | London |
| Repointing | Point in existing laid patio ( 50 sq metres ) with empty joints, sweep off / out leaves debris. Point in with 5 sharp sand, and 1 opc. bucket handle joints, brush lightly. Quoted £970. | £970 | Total price | South West |
| Repointing | Terrace house re-pointed with lime mortar to allow the building to breathe. 24m2 scaffold included in price. | £1,000 | Total price | North East |
| Repointing | Repoint front of victorian terraced house, including rake out and scaffolding. | £1,100 | Total price | North East |
| Repointing | rake out acid clean plus weather seal 29 m2, scaffolding not inc | £1,236 | Total price | Yorkshire & the Humber |
| Repointing | chop off old render cut out damaged bricks and replace re-point | £60 | Per m² | East of England |
| Repointing | 3 bedroom semi front, back and gable end repointed. | £1,270 | Total price | North West |
| Repointing | grinded out using 6mm diamond blade, then re-pointed using pointing guns to ensure they are properly filled. 60 squared meters. | £1,130 | Total price | North East |
| Repointing | Turn of century town house, Rake out cement, re-point with specifically matched lime mortar, extensive mortar repairs to weathered stone faces. Remove cement flaunches on sills and replace with lime. All traditional methods, including materials but not including scaffold. | £115 | Per m² | South East |
| Repointing | Repoint approx 22 m2 of bungalow front and side. No scaffolding required. Rake out and repoint to weatherstruck finish. | £575 | Total price | South East |
| Repointing | 100 m2 of poing ground out and repointed bucket handle finish, scaffold towerused included in price. | £2,800 | Total price | North East |
| Repointing | 62m2 of patio power washed, old cement pointing removed and replaced. | £25 | Per m² | Cymru Wales |
| Repointing | Small area of repointing at base of wall, approx 4 sqm – remove existing mortar with angle grinder & rake out – repoint with ‘weatherstruck’ finish – two men, half a day | £300 | Total price | South East |
| Repointing | Remove rotten mortar from 4 valleys (each side of valley) on bungalow no scaffold. total linear 14m. repoint materials used 5 bags sand 2 large cement. | £375 | Total price | West Midlands |
| Repointing | approx 10 sq metres brickwork raked out with angle grinder and re pointed, weather struck finish, scaffolding seperate to job, not in cost | £295 | Total price | North West |
| Repointing | Repointing a three-storey,three/four bedroom victorian.(Scaffold not included) | £45 | Per m² | South West |
| Repointing | Repair old settlement crack using stainless rods/plates rake out complete wall, approx 22.5 sq mtr and repoint | £1,727 | Total price | East of England |
| Repointing | Rake out and repoint Gable end of 3 bed semi 47M2. Labour only. | £1,250 | Labour only | East Midlands |
| Repointing | Rake out using vac. dust controlled angle grinder. Repoint 100sqm of brickwork to bungalow. | £3,700 | Total price | North West |
| Repointing | Quoted two people (£250 each) for approx 5 days to rake out cement mortar incorrectly used used on old flint and brick barn and repoint using lime mortar. | £500 | Daily rate | East of England |
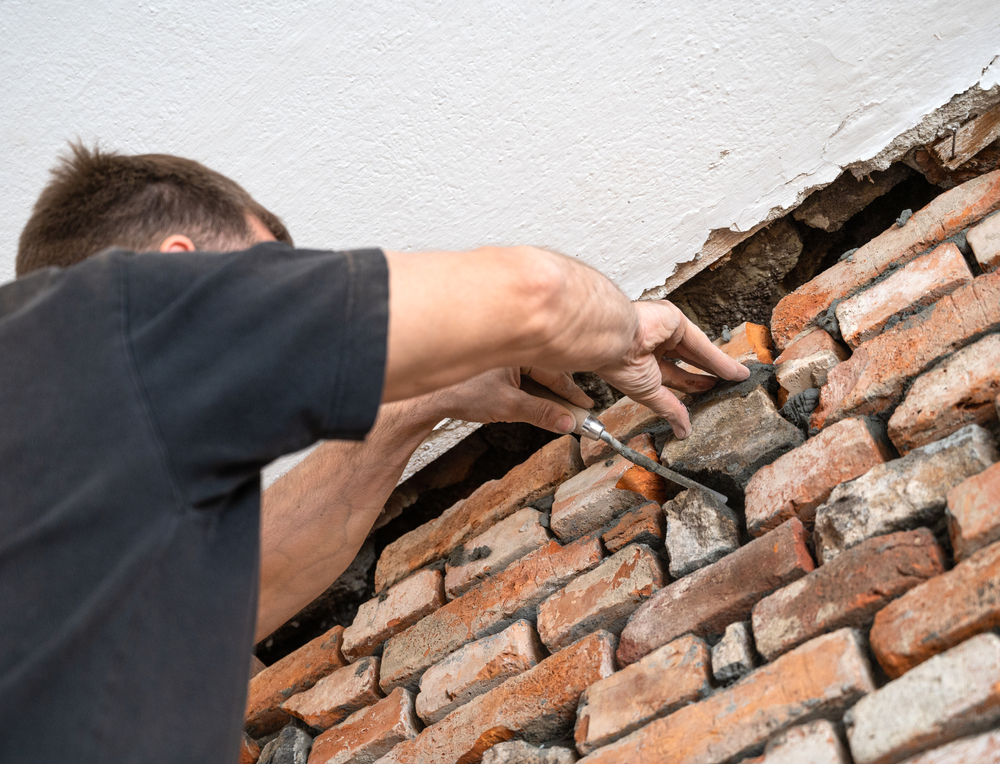
What is repointing and why is it important?
Brickwork adds character and strength to UK homes, but over time, the mortar between bricks can crack or wear away. When this happens, your property may become vulnerable to damp, draughts, or even structural damage.
The solution is brick repointing.
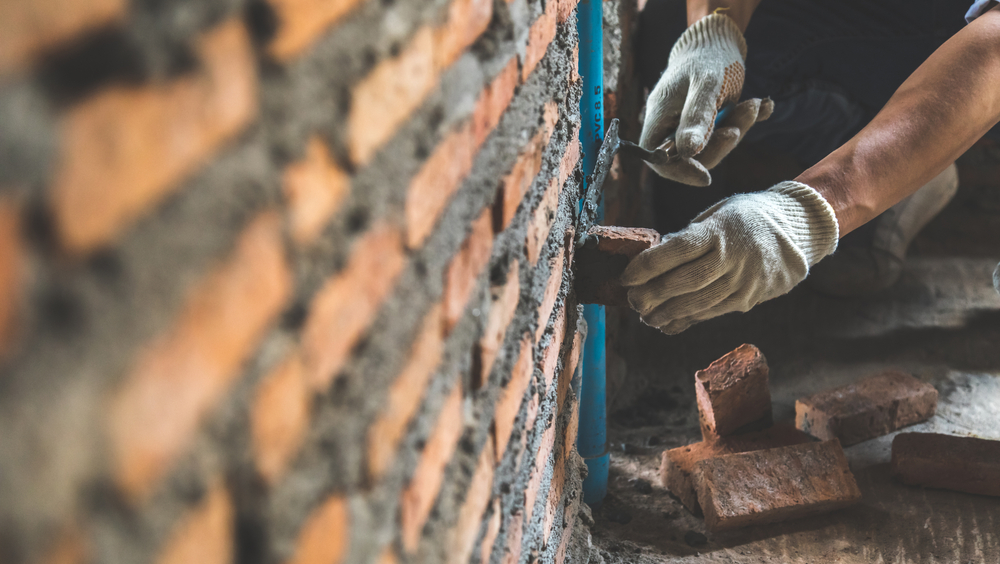
Pointing is the outer layer of mortar that is used when laying a brick wall. To repoint a wall means to remove the old existing mortar to a certain depth and then replace it with new mortar. The old mortar is raked out using a trowel or similar tool and then replaced with new mortar.
In older properties it’s generally best practice to use the same mortar as originally used; this may be lime mortar as opposed to modern Portland cement mortar. Lime mortar is softer once set which is kinder to older bricks and breathable, which can help alleviate damp problems in period properties.
Repointing improves the look of your home and also:
- Protects against water ingress and damp
- Strengthens the structure of your walls
- Improves energy efficiency by sealing gaps
- Maintains property value
If your mortar looks crumbly, cracked, or is falling out, it’s likely time to consider repointing.
Average cost to repoint a wall
The average cost to repoint a brick wall in the UK is £50 to £60 per square metre. However, prices can vary depending on the property, mortar type, and location:
| Job Type | Average Cost (per m²) | Typical Range | Notes |
| Standard brick repointing | £55 | £30 to £60 | Most common jobs |
| Lime mortar repointing | £70 | £60 to £80 | Essential for period homes |
| Specialist/stone repointing | £90 | £80 to £100+ | Heritage or listed properties |
You should expect higher rates in London and the Southeast, where prices can exceed £80 to £100 per square metre.
Cost to repoint a whole wall or house
For larger jobs, most homeowners are quoted a total project cost rather than per square metre.
| Project | Typical Cost Range |
| One external wall | £1,000 to £2,200 |
| Semi-detached house | £2,500 to £5,000 |
| Victorian terraced house | £3,000 to £4,400 |
| Chimney repointing | £500 to £1,000 |
Scaffolding is often required, especially for upper floors, which can add £500 to £1,000+ to the bill.
Factors that affect repointing costs
Several factors affect what you’ll pay:
- Mortar type. Lime mortar (for heritage properties) costs more than modern cement mortar.
- Property size and access. Larger homes or walls needing scaffolding increase costs.
- Condition of brickwork. Damaged bricks may need replacement before repointing.
- Location. London and inner-city jobs are more expensive than rural areas.
- Complexity. Chimneys, ornate detailing, or hard-to-reach areas push costs higher.
DIY vs hiring a professional bricklayer
While DIY repointing may seem cheaper, it’s time-consuming and easy to get wrong. Incorrect mortar or poor workmanship can trap moisture, leading to costly damage later. For most homeowners, hiring a qualified bricklayer or stonemason is the safest option.
More tips for UK homeowners
- Get at least 3 quotes from local tradespeople to compare.
- Ask about scaffolding costs as these are sometimes quoted separately.
- Clarify the mortar type; lime is usually required for older properties.
- Check previous work and reviews, especially for period homes.
- Don’t just choose the cheapest as quality repointing lasts decades, while poor work may fail in a few years.
FAQs about repointing costs
How often should brickwork be repointed?
Most brickwork needs repointing every 20 to 30 years, though exposed areas like chimneys may require it sooner.
Is lime mortar worth the extra cost?
Yes, especially for older properties. Lime mortar allows walls to “breathe” and helps prevent damp.
Can I repoint just one section of wall?
Yes, localised repointing is possible and cheaper, but for uniform appearance and durability, many homeowners opt for whole walls.
In summary…
- Average repointing cost: £50 to £60 per square metre
- Whole wall: £1,000 to £2,200
- Full house: £2,500 to £5,000+
- London prices: £80 to £100 per square metre for complex or lime mortar jobs
- Chimneys: £500 to £1,000
Repointing is a worthwhile investment that protects your home from damp and structural problems while keeping it looking its best.
Thinking about repointing your home? Start by getting free, no-obligation quotes from local brickwork specialists so you can compare prices and find the right contractor.